Containerization and Local Orchestration
Containerization packages your application and its dependencies into a portable unit. Local orchestration then runs and coordinates multiple of those units reliably on your machine.
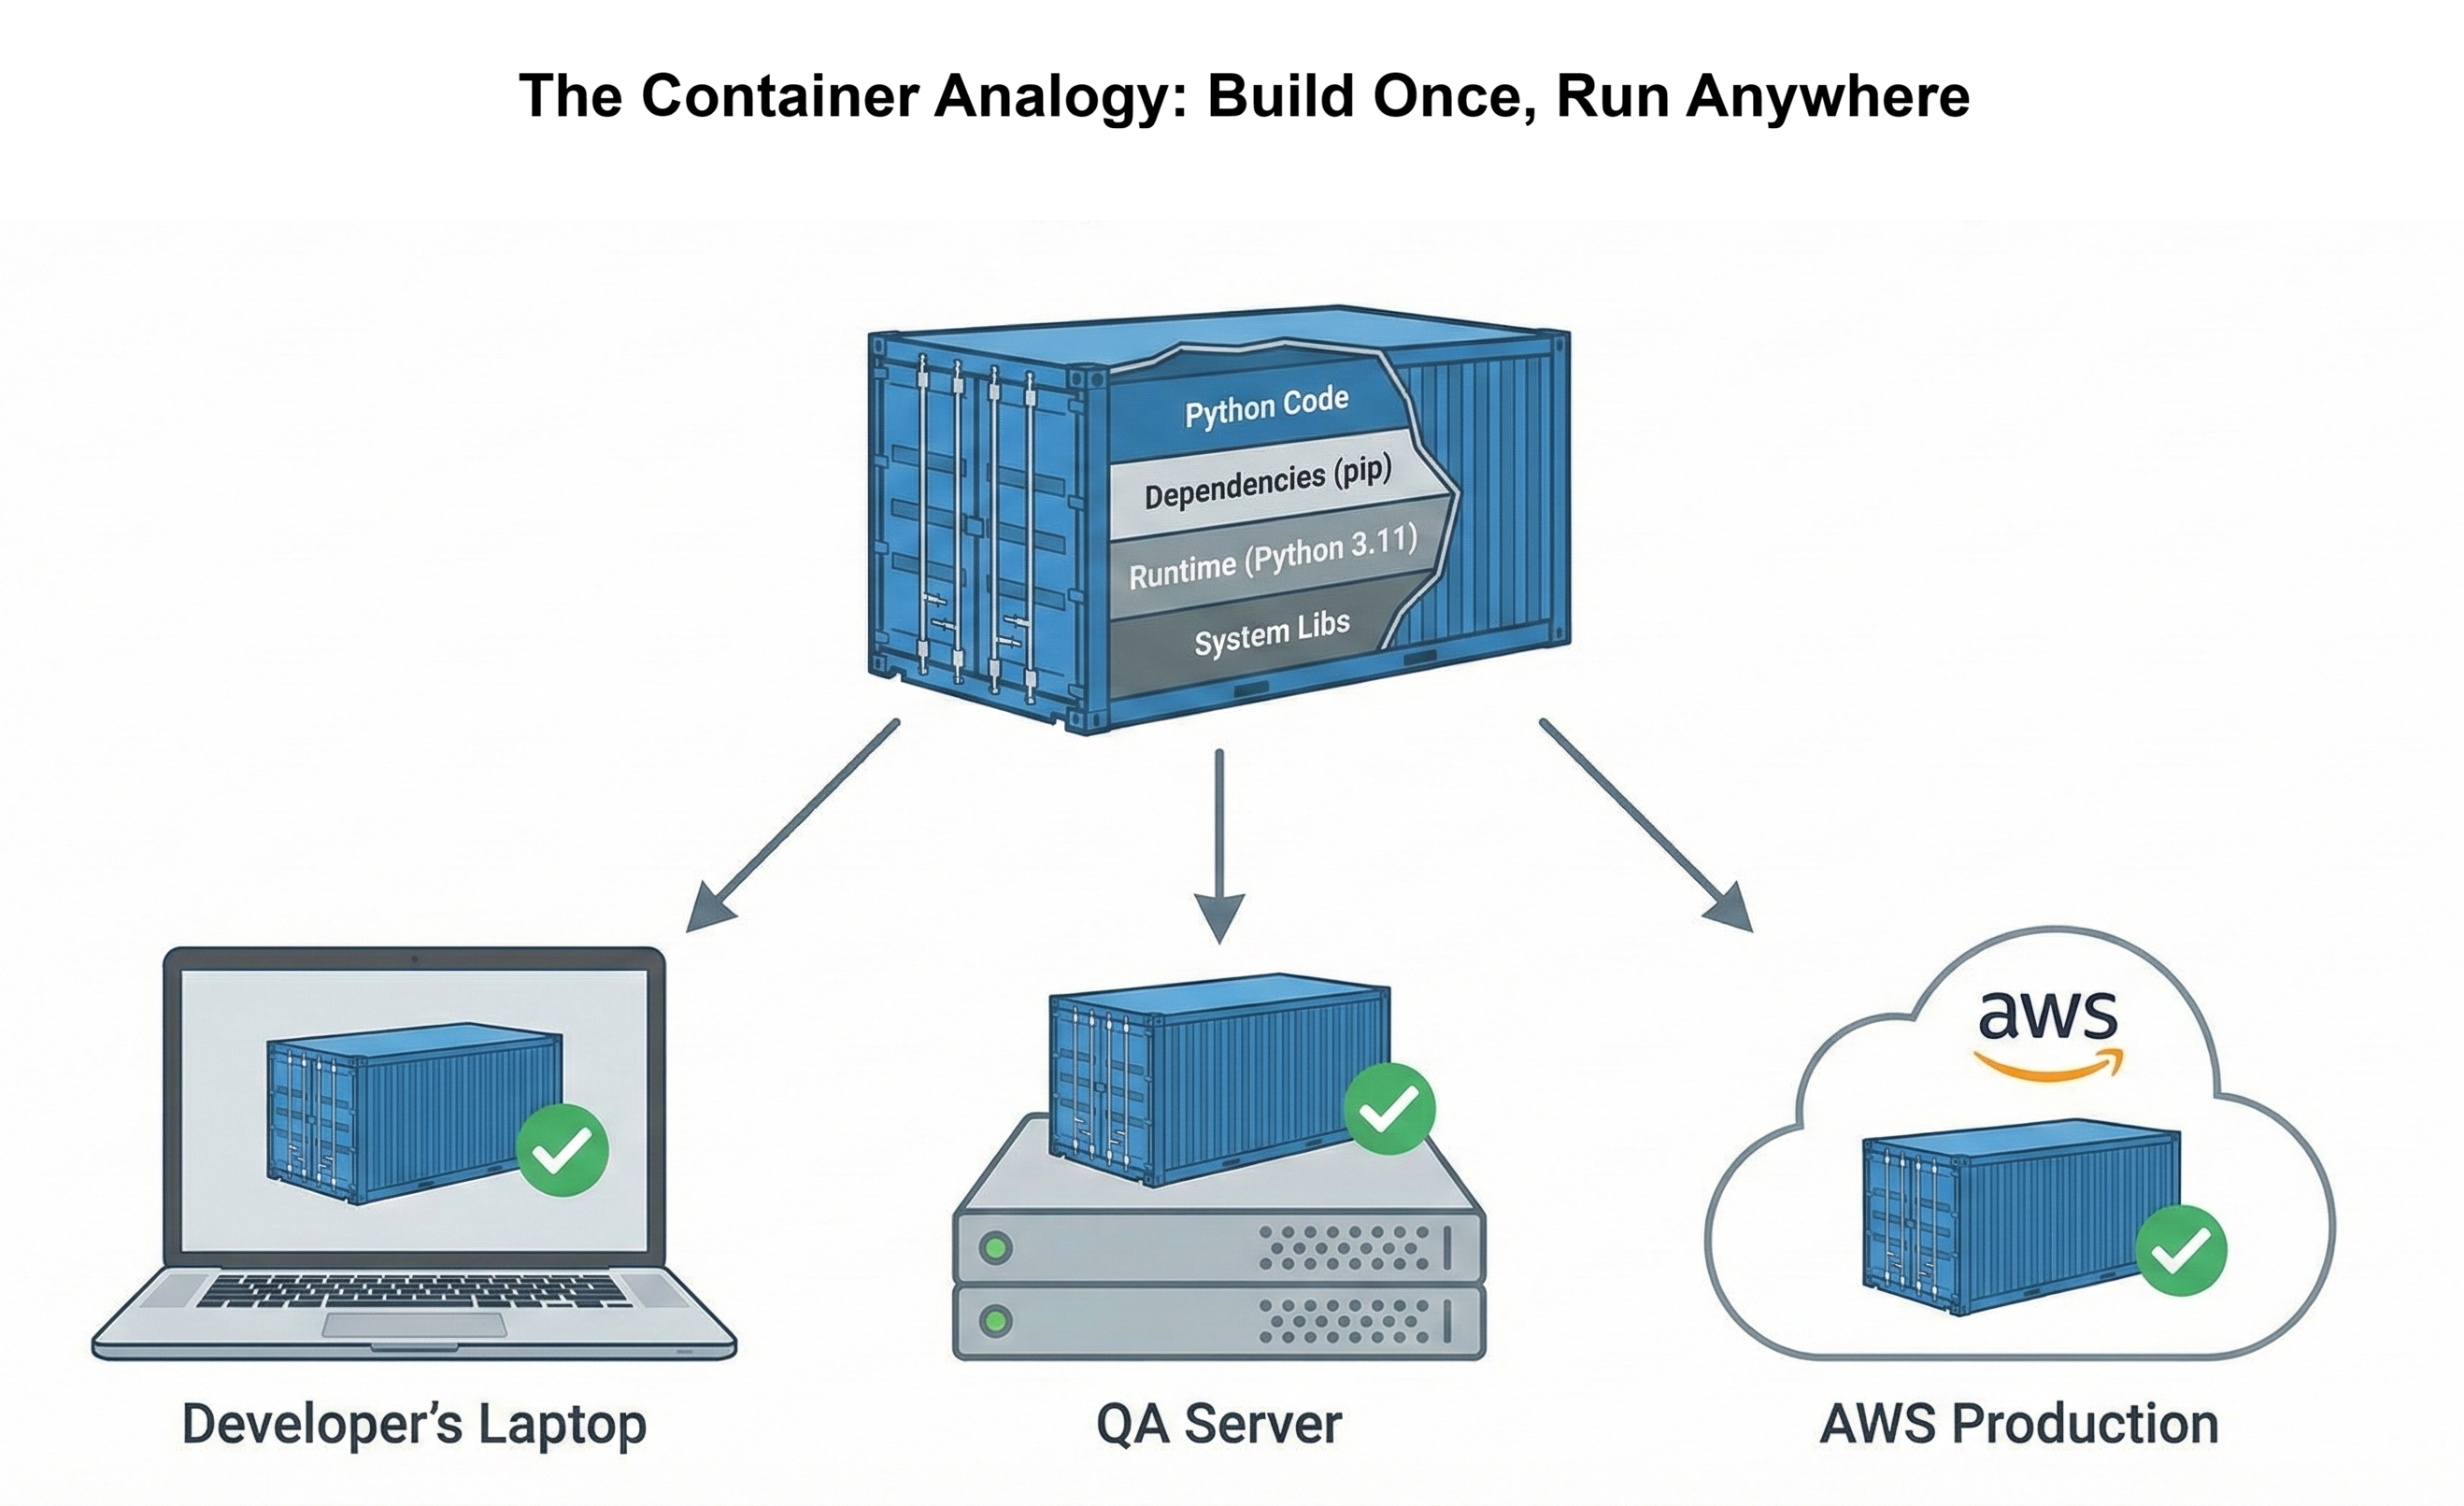
With containerization, you bundle code, libraries, runtime, and system tools into a self-contained image that behaves the same on every developer laptop and server.
Local orchestration builds on that by managing multiple containers at once: your web app, database, background workers, and supporting services can all be started, stopped, and wired together with a single command. Together, they give you a realistic “mini production” environment on your local machine, making development, testing, and debugging much more predictable.
In this chapter you’ll use Docker to build, run, and orchestrate your services locally so your stack runs the same way on every machine.
Background
Your News Aggregator API from Chapter 26 works perfectly on your laptop. FastAPI serves requests quickly. PostgreSQL stores articles efficiently. Rate limiting protects against abuse. You run python main.py, test the endpoints in your browser, and everything responds correctly. The code is production-ready.
Then you share the repository with a teammate. They clone it, install dependencies, and run the application. Five errors appear immediately. PostgreSQL isn't installed. Environment variables are missing. The Python version is wrong. Database migrations haven't run. What took you three seconds to start takes them three hours to debug. This is the "works on my machine" crisis that containerization solves.
The problem isn't your code. The problem is implicit dependencies. Your laptop has PostgreSQL 15 installed. Your teammate has PostgreSQL 14. Your Python is 3.11. Theirs is 3.10. Your .env file has API keys configured. Theirs doesn't. Hundreds of environmental differences create hundreds of potential failures. Professional developers don't debug these differences manually. They package applications with everything needed to run identically anywhere.
This chapter teaches containerization: packaging your application with its runtime, dependencies, and configuration into a standardized container. You'll containerize your News API, orchestrate it with PostgreSQL and Redis using Docker Compose, optimize performance with caching, and start your entire production-ready stack with one command: docker compose up. By the end, sharing your application means sharing a repository that works immediately for everyone, and deploying to AWS in Chapter 28 becomes a straightforward process.
Chapter Roadmap
This chapter takes you from a laptop-only Python API to a fully containerized, multi-service stack that runs identically on any machine. Here's the journey:
Performance Profiling
Before containerizing, you'll profile your News API to establish baseline performance metrics. You'll add timing middleware, identify bottlenecks with load testing, and understand where your application spends its time — ensuring you don't package slow code into containers.
Understanding Containers
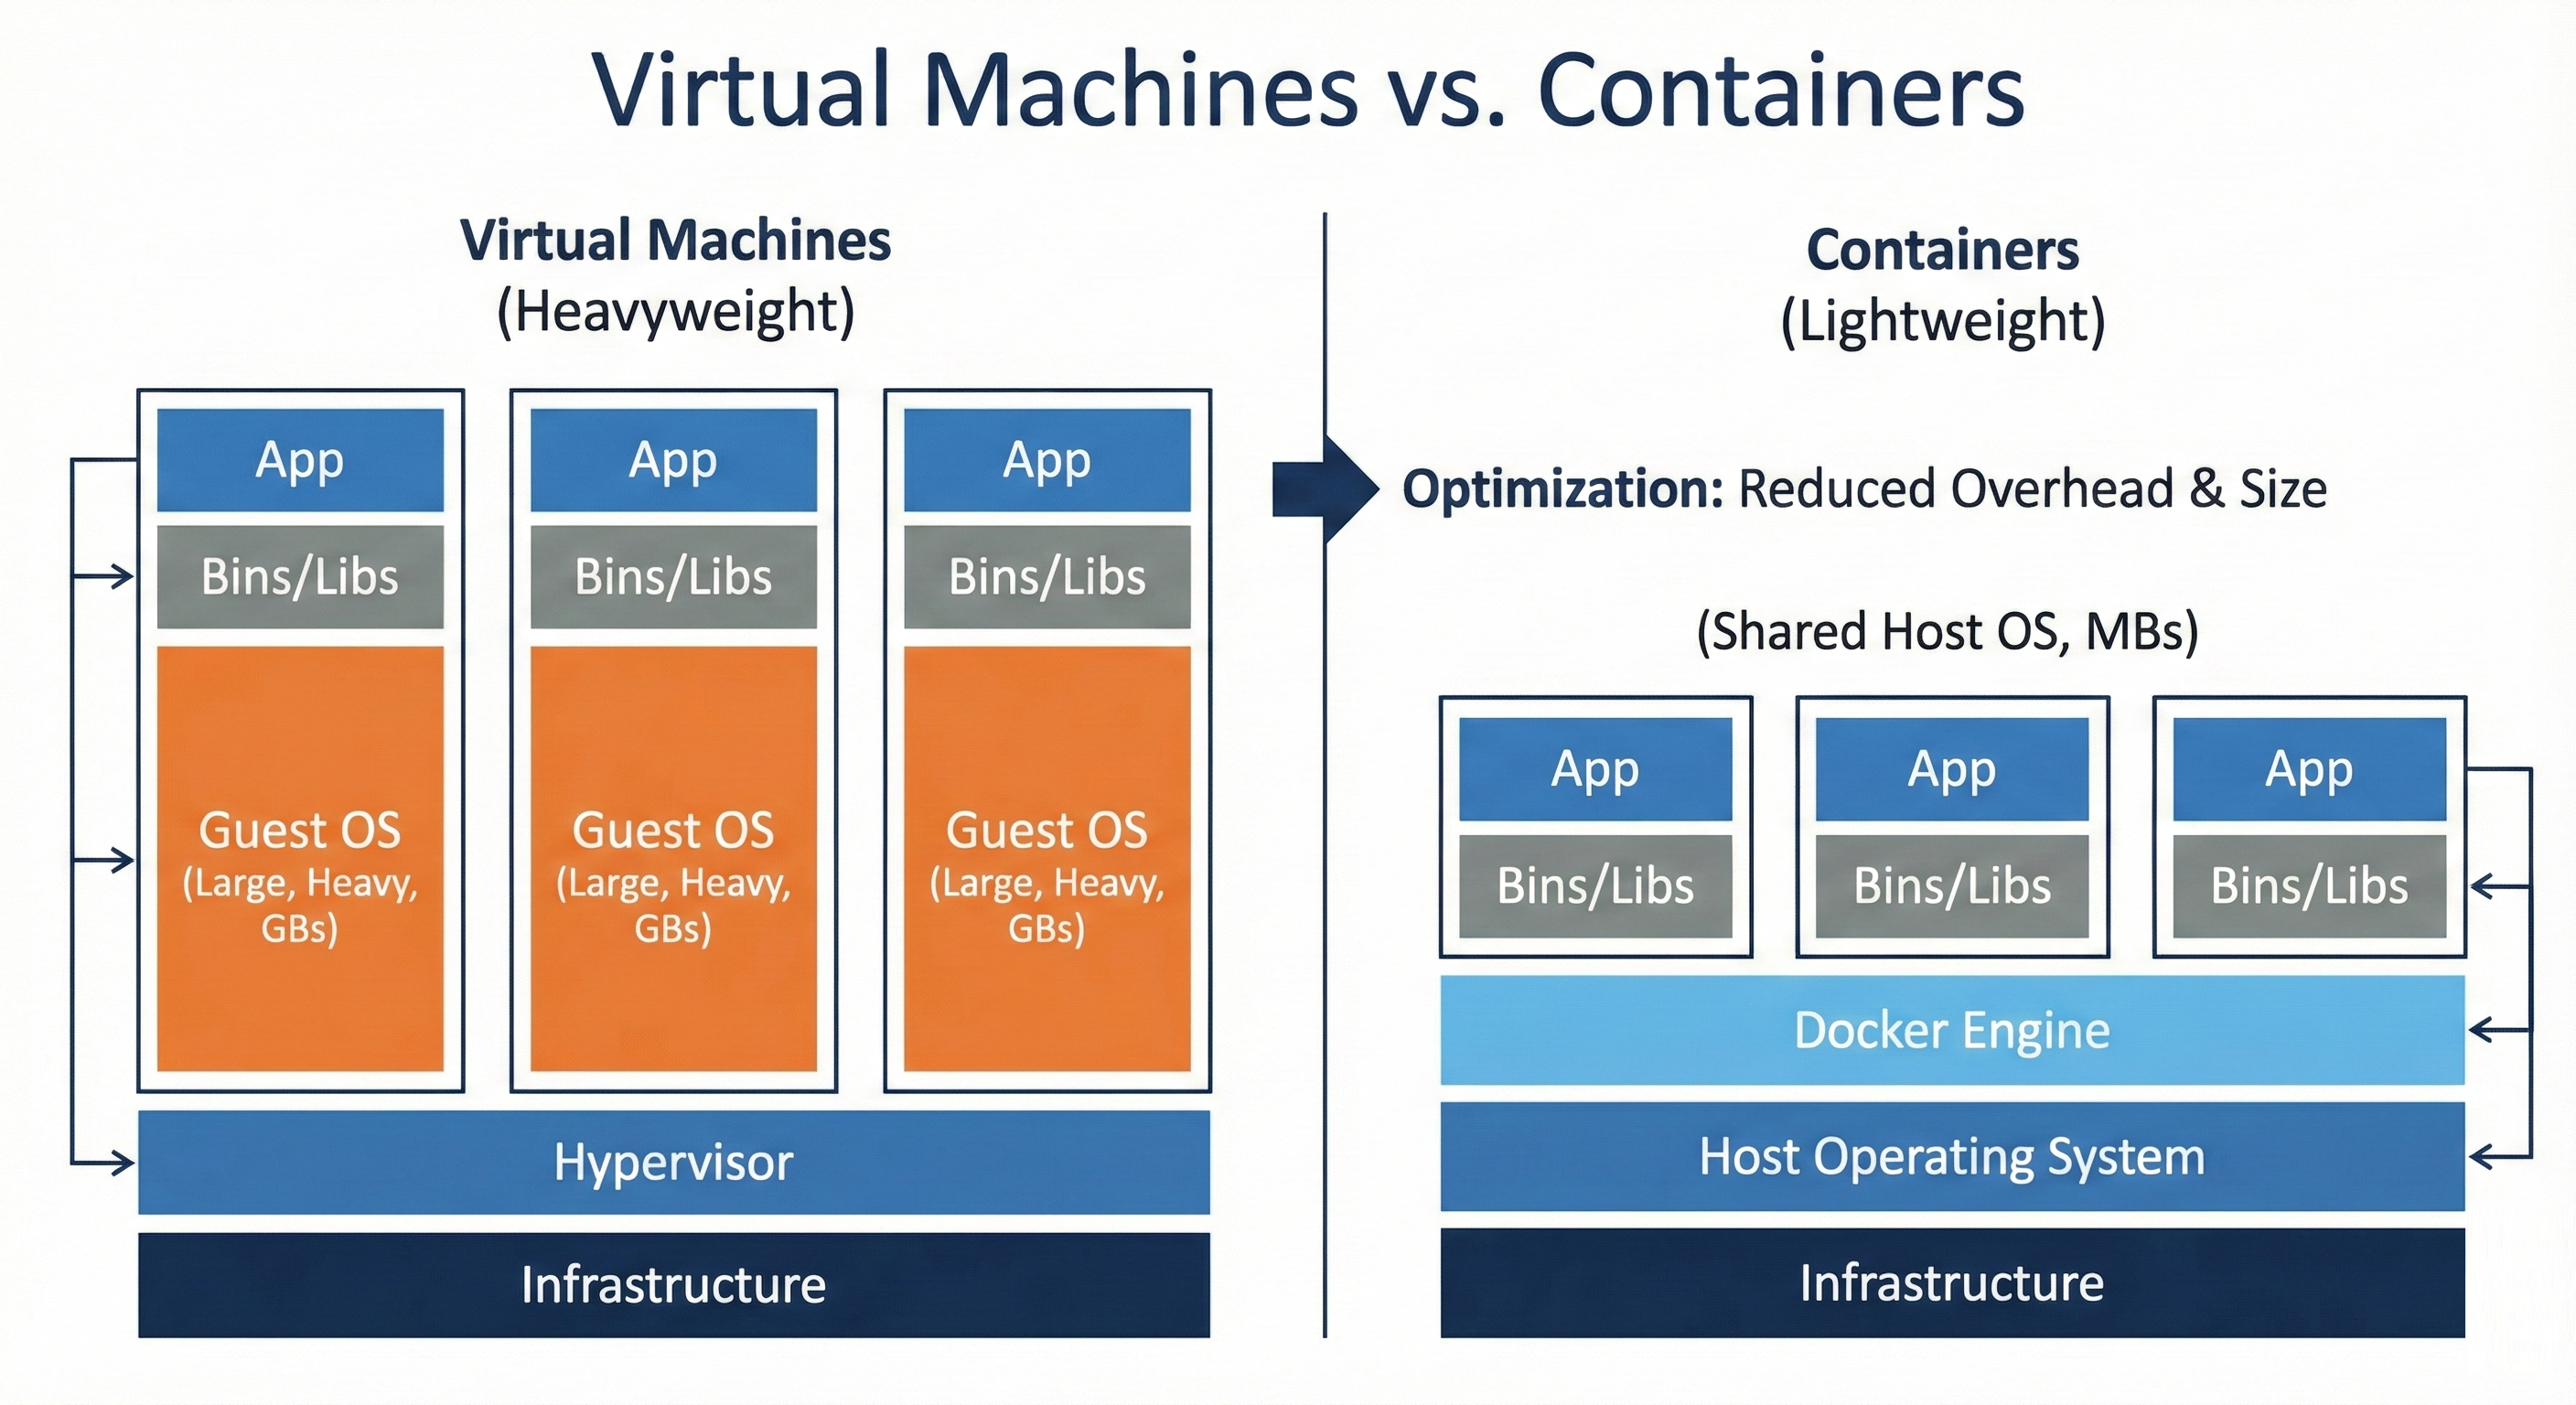
You'll learn what containers are, how they differ from virtual machines, and why professional teams rely on them. This section builds the conceptual foundation for the "works on my machine" problem and explains when containerization is the right solution.
Docker Fundamentals
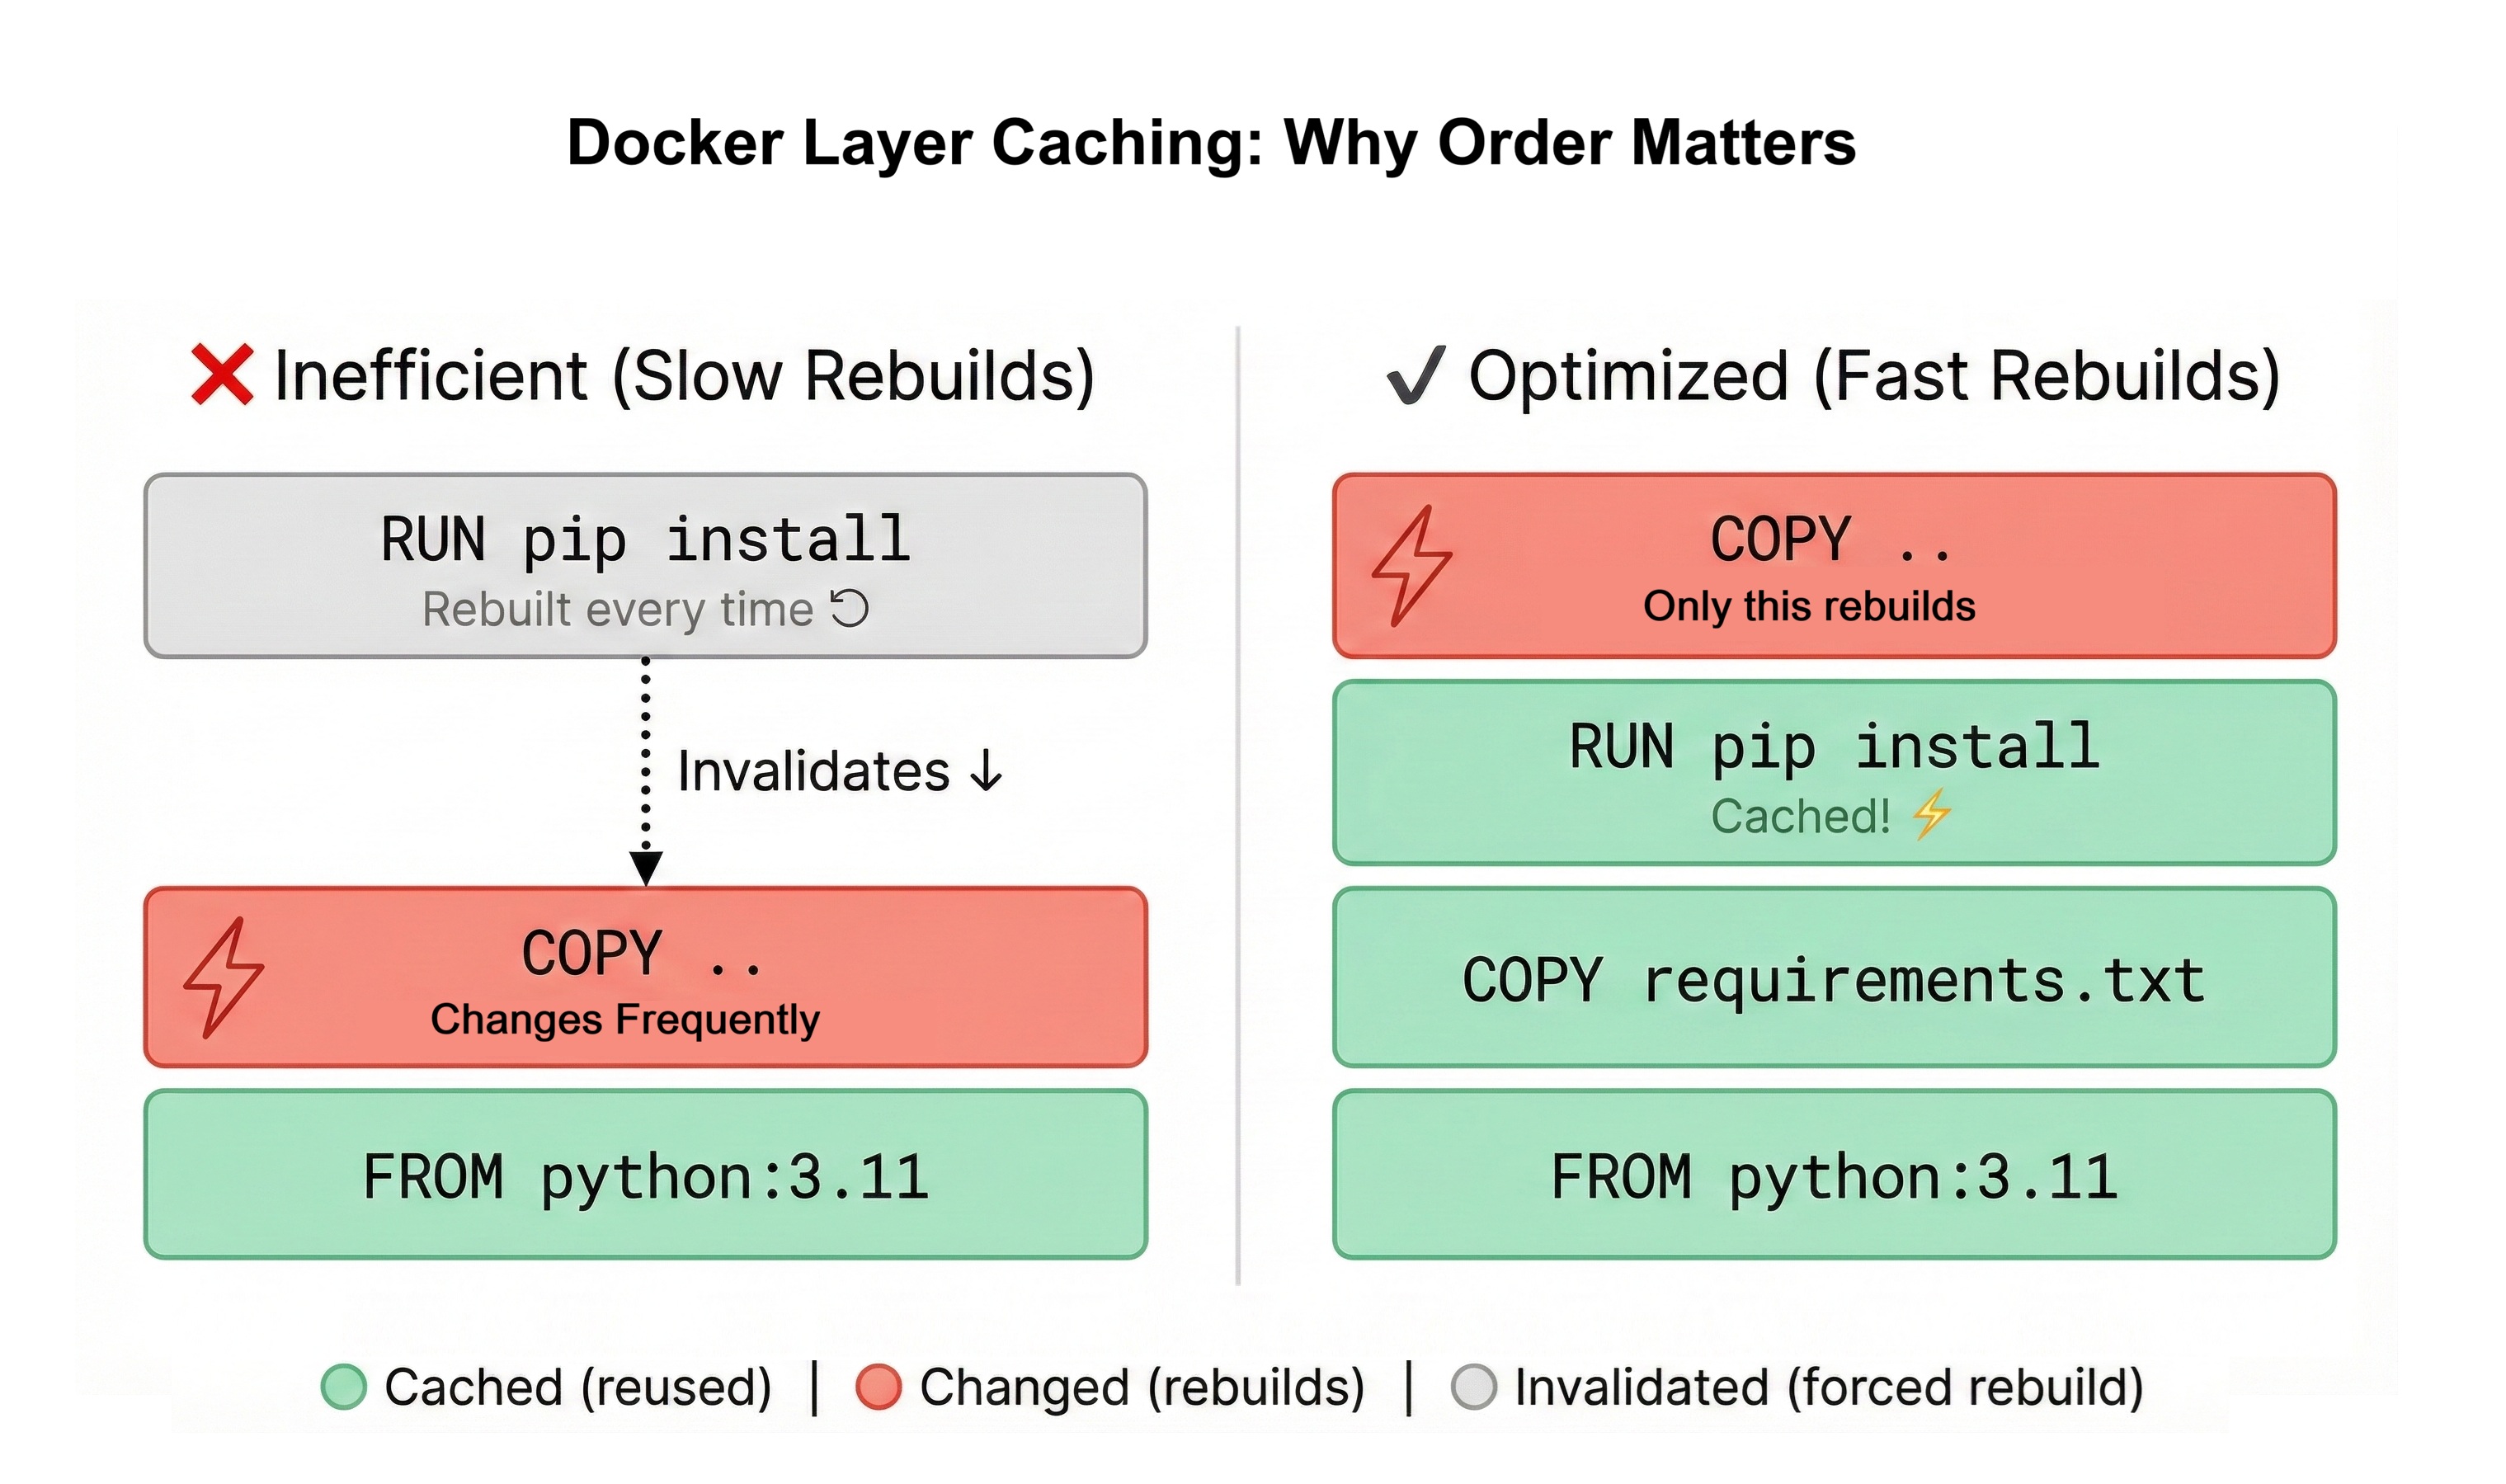
You'll install Docker, write your first Dockerfile, and build optimized images using multi-stage builds. You'll master Docker layer caching and .dockerignore to keep images small and builds fast.
Orchestrating with Docker Compose
You'll wire your News API, PostgreSQL, and networking together using docker-compose.yml. You'll configure environment variables, manage persistent volumes, and control your entire stack with a single docker compose up command.
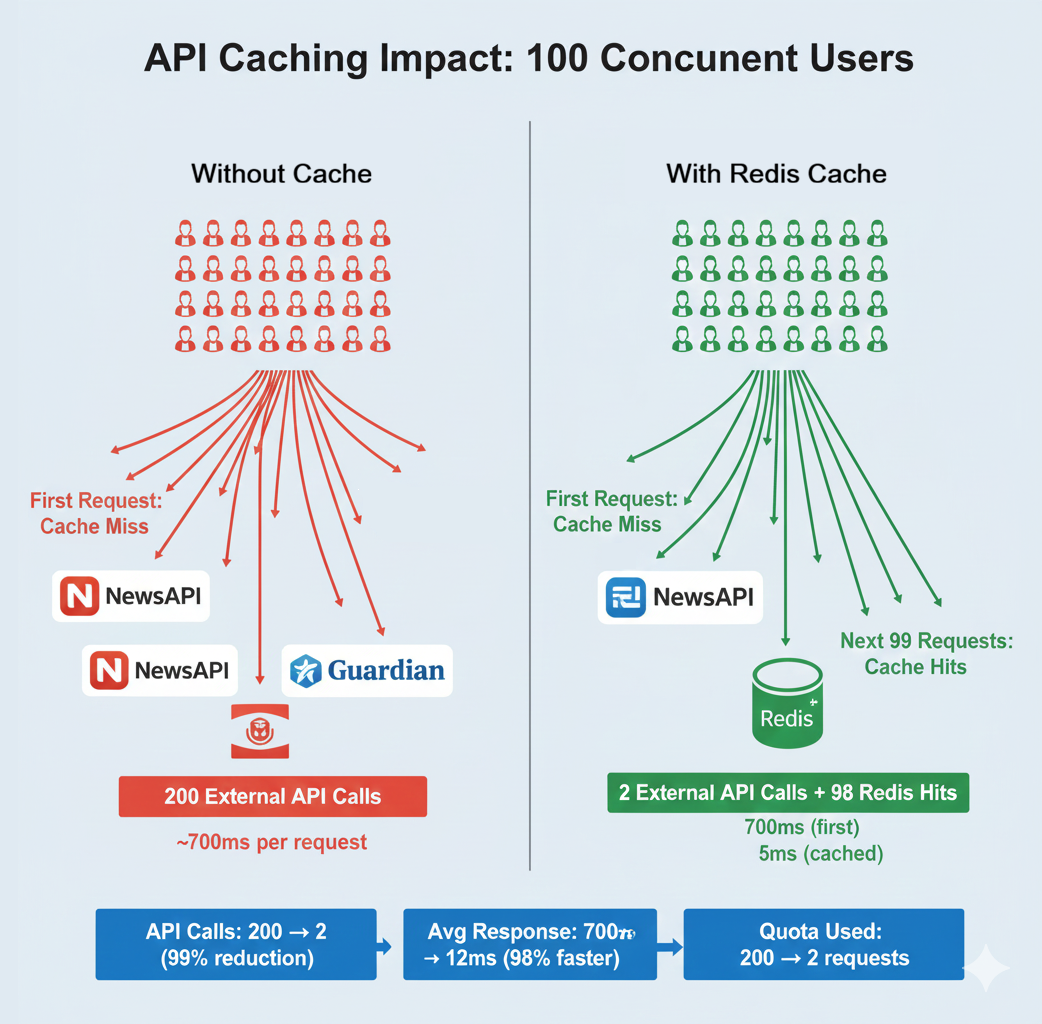
Adding Redis Caching
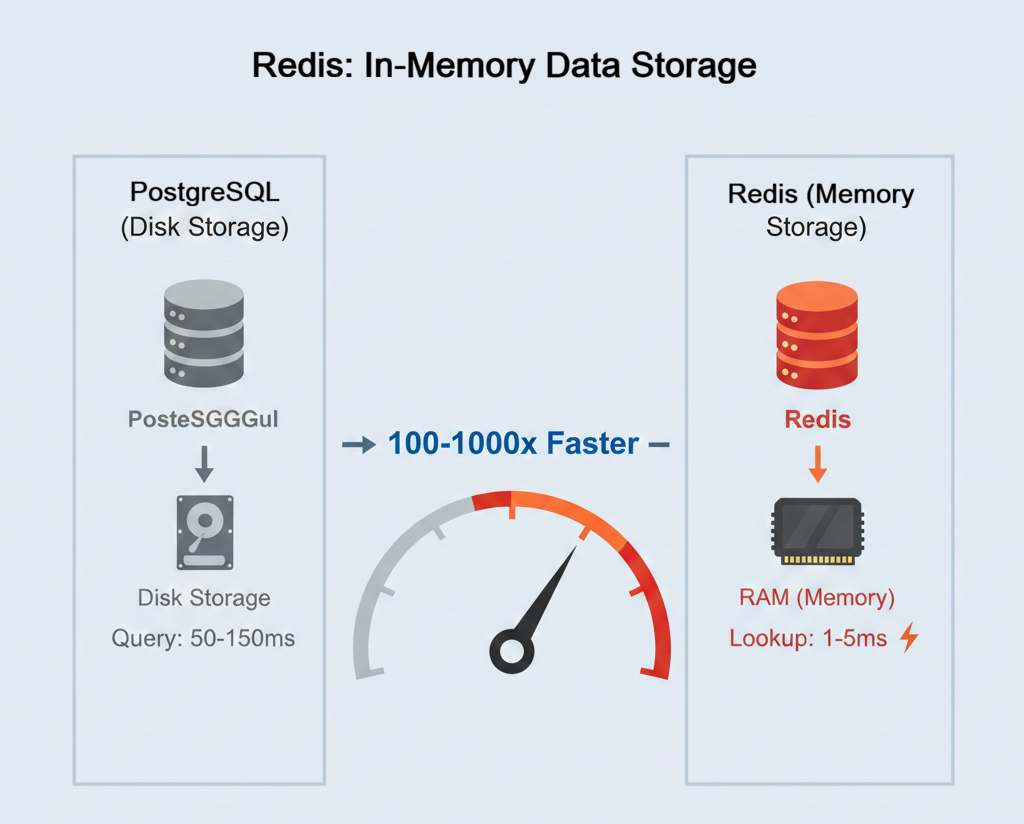
You'll add a Redis container to your stack, implement caching for your API endpoints, and measure the performance improvement — dropping response times from 650ms to 5ms for cached requests. This completes your production-ready, three-service architecture.
Learning Objectives
By the end of this chapter, you'll be able to:
- Explain what containers are and the problems they solve versus virtual machines and manual deployment
- Install Docker and verify your development environment is ready for containerization
- Write production-ready Dockerfiles using multi-stage builds to minimize image size
- Build Docker images and run containers with proper configuration and networking
- Orchestrate multi-service applications (API + PostgreSQL + Redis) with Docker Compose
- Configure environment variables, volumes, and networks for local development stacks
- Profile application performance and identify optimization opportunities before scaling
What You'll Build
You'll containerize your News Aggregator API from Chapter 26, transforming it from a laptop-only application into a portable, production-ready stack. The current state requires manual setup: install PostgreSQL, configure environment variables, run migrations, start the API server. The target state runs with one command on any machine with Docker installed.
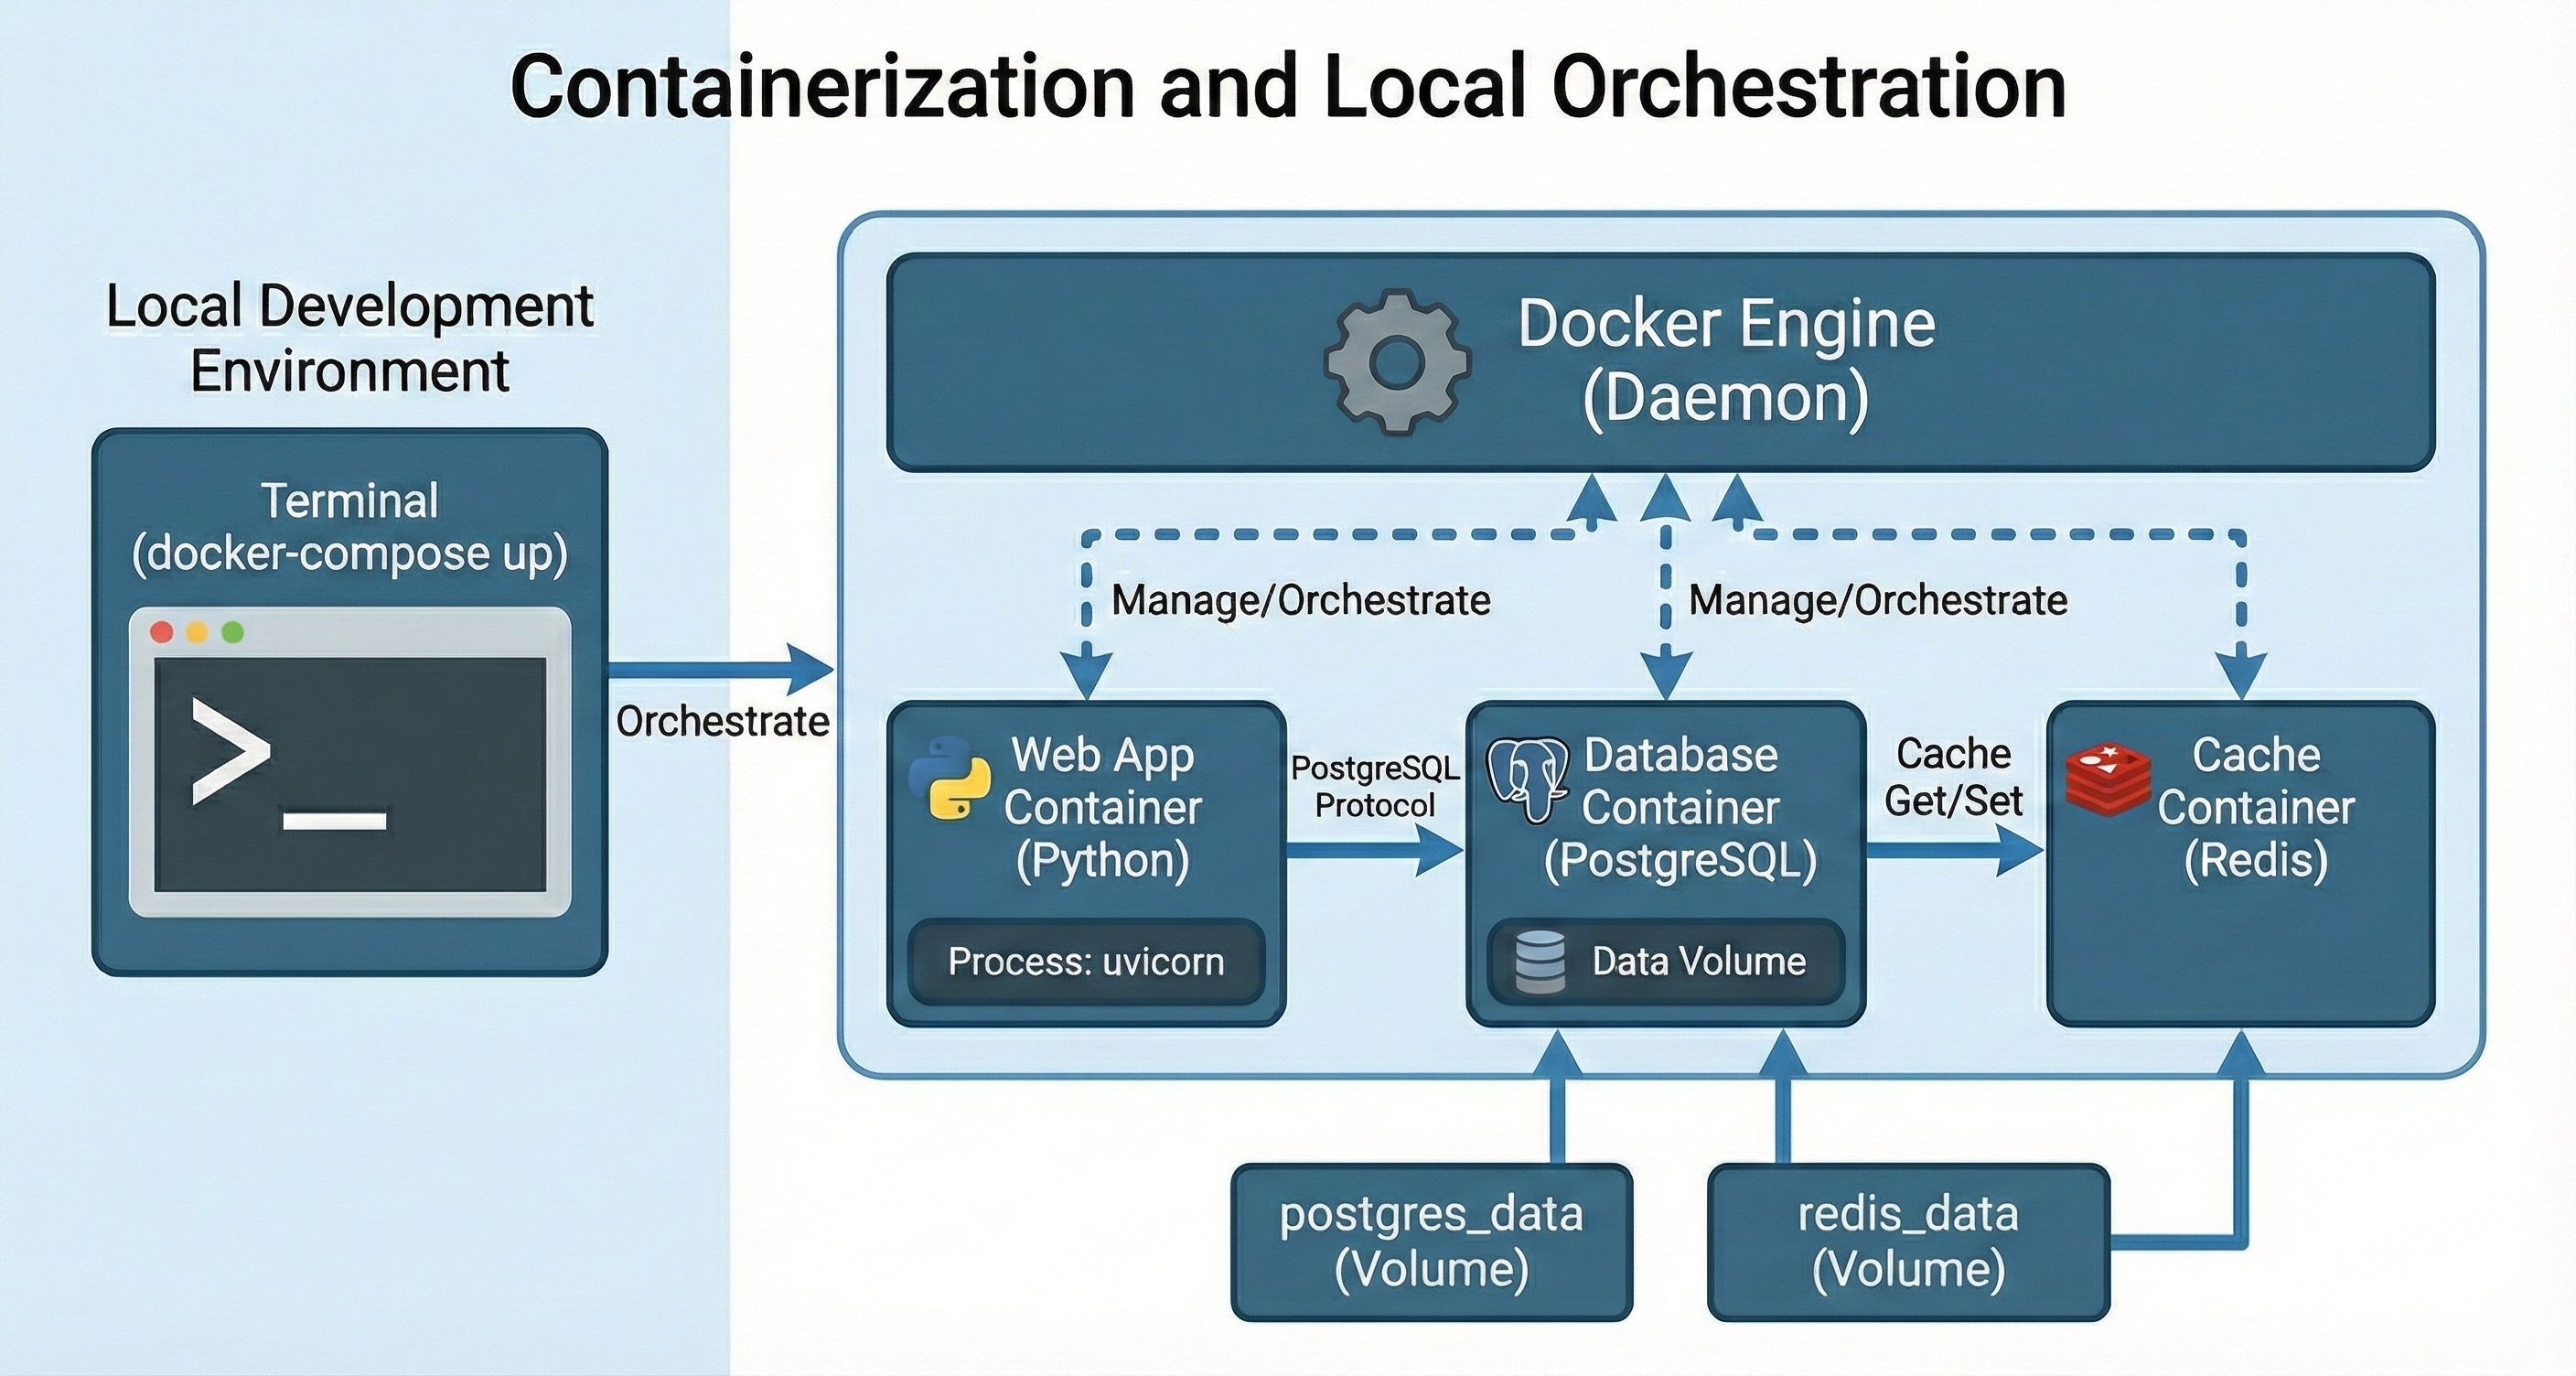
Your containerized stack includes three services working together. The News API container runs your FastAPI application with all Python dependencies packaged inside. The PostgreSQL container provides the database with persistent data storage that survives restarts. The Redis container adds an in-memory caching layer that reduces database load and improves response times from 650ms to 5ms for cached requests.
Docker Compose orchestrates these three containers, managing networking so they can communicate, configuring environment variables, and ensuring services start in the correct order. When you run docker compose up, all three containers start together. Your API is accessible at http://localhost:8000, exactly like Chapter 26, but now teammates can clone your repository and start the entire stack without installing anything except Docker.
This preparation is essential for Chapter 28. AWS deployment requires containerized applications. By containerizing locally first, you'll understand how containers work, optimize performance, and debug issues in a familiar environment before deploying to the cloud. The patterns you learn here (Dockerfile optimization, environment configuration, service orchestration) apply directly to production deployments on AWS, Azure, or Google Cloud.